What Is a Slider Necklace? How It Works and How to Wear It
Share
Some jewellery does not need a reason, but it does need to sit where you want it. A slider necklace is designed to change length without removing links or committing to one fixed position. The adjustable element can move along the chain or cord, letting the necklace sit closer to the collarbone, follow a neckline or drop lower over clothing.
The slider is not the same as an extender chain, and different mechanisms should not all be pulled in the same way. This guide explains how the main designs work and how to adjust, style and store one gently.
What is a slider necklace?
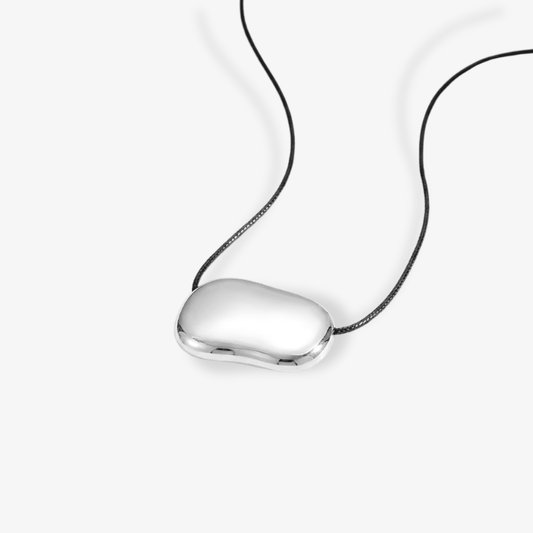
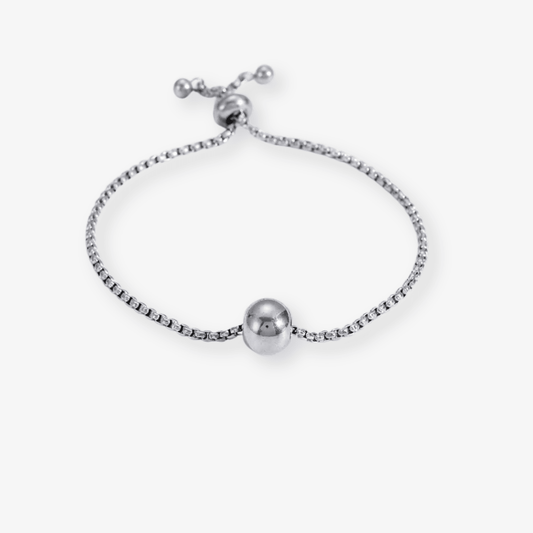
A slider necklace is an adjustable necklace with a movable component that changes the wearable length. The slider may look like a bead, sphere, bar, tube or decorative centrepiece. Depending on the design, one or two lengths of chain or cord pass through it. Moving the slider changes where the necklace sits and, on lariat-style designs, how far the ends hang.
The term describes the adjusting method rather than one particular aesthetic. A slider necklace can be minimal or detailed, symmetrical or asymmetrical, short or long. What the designs share is the ability to alter the position without adding or removing sections of chain.
How is a slider necklace different from other adjustable necklaces?
Slider versus extender chain
An extender is a short section of chain with several attachment points. You choose one ring and fasten the clasp to it, so the necklace offers a small number of preset lengths. A slider generally allows more gradual adjustment along the available range. Both are adjustable, but the hardware and the way you set the length are different.
Slider versus lariat
A lariat is defined mainly by its elongated shape and drape. Some use a slider, while others pass through a ring or tie. “Lariat” describes the silhouette; “slider” describes how the position is adjusted. A necklace can be both.
Slider bead versus sliding knot
Metal-chain designs often use a bead or housing that grips the chain internally. Cord necklaces may use one or two sliding knots instead. The visual effect can be similar, but the method of adjustment is not. A cord knot is moved along the cord; a slider bead should be handled according to the construction of its chain and internal grip.
How does a necklace slider work?
Many slider beads hold the chain through friction. Some contain an internal gripping element; others use a spring or a precisely fitted opening. Bolo-style necklaces may pass two ends through one central slider, while a single-chain design may move an adjusting bead near the clasp or decorative element.
Because the internal construction is not always visible, do not assume that every slider is operated in exactly the same way. Some are designed to move when the bead is held and the chain is pulled gently. Others have a small release point that needs to be pressed. Product instructions take priority over generic advice.
The adjustment should feel controlled. If a slider suddenly slips, jams or needs force, stop using the mechanism until it has been checked.
How to adjust a slider necklace gently
1. Identify the moving part
Before pulling anything, look at the necklace laid flat. Find the slider, the fixed ends, the clasp if there is one, and any pendant or decorative bead. Notice which section is intended to pass through the slider. This prevents the common mistake of tugging the pendant or clasp instead of the adjustable chain.
2. Straighten the chain or cord
Remove twists and make sure the chain enters and leaves the slider in a straight line. Pulling at an angle can place unnecessary pressure on a fine chain or cause it to catch inside the mechanism. If the necklace is already knotted, deal with the knot first rather than trying to slide through it.
3. Hold the slider, not the decoration
Support the movable bead or housing between your fingers. Use the other hand to guide the chain or end piece slowly. Avoid pulling on a pendant, charm or clasp unless the maker’s instructions specifically show that method.
4. Move a little at a time
Make small adjustments and check the length as you go. A slow, straight movement gives you more control and makes resistance easier to notice. Yanking the chain may not only overshoot the desired length; it can also put stress on the connection points.
5. Stop if the mechanism resists
A slider that will not move may be twisted, dirty, damaged or simply designed differently from what you expect. Do not use pliers, pins, oil or household products to free it. Check the original instructions or ask a jeweller to inspect it. Forcing a fine mechanism can turn a small issue into a broken chain.
Choosing the right slider necklace length
There is no single correct position. Start with where you want the focal point to sit, then adjust around the neckline, fabric and other jewellery. Check that the pendant does not catch on a collar or seam.
With crew necks and round necklines
Try a shorter setting that keeps the necklace clearly above the fabric, or a longer setting that sits decisively below it. A pendant resting directly on the neckline edge may move in and out of view, so a little separation usually looks more intentional.
With V-necks
A slider makes it easier to place the pendant within the open space of the V. The necklace does not need to copy the neckline perfectly; the aim is to avoid the focal point landing awkwardly on the fabric edge.
With square or strapless necklines
A collarbone-length setting leaves open space above the neckline, while a longer one creates contrast with its horizontal line. Choose according to the pendant’s scale.
With shirts and blazers
Wear it shorter inside an open collar or longer over a top. Test the full outfit, especially if lapels or buttons can catch a fine chain.
With high necks and knitwear
A longer setting can keep the necklace visible over fabric. Check that the surface is smooth enough not to snag the chain and that the pendant does not repeatedly strike a zip or button. Chunky or textured knits may suit a more substantial chain better than a very fine one.
For a broader comparison of standard necklace positions, Moon Said So’s guide to necklace and choker lengths explains how common silhouettes sit on the body.
How to layer a slider necklace
Adjustability is especially useful when layering because the slider can create space between pendants. Begin with the necklace that has the strongest focal point, then position the other chains above or below it. Clear gaps make each piece easier to see and reduce the amount of chain sharing the same path.
Changing the length cannot guarantee a tangle-free stack. Fine chains move with the wearer, and clasps and pendant shapes still matter. Two necklaces set at almost the same length are more likely to cross.
If layering is the main goal, the practical necklace-layering guide covers spacing, focal points and proportion in more detail.
How to store a slider necklace
Before storing it, return the necklace to a relaxed position rather than leaving a long loose tail wrapped around the chain. Fasten the clasp if the design has one, then lay the necklace flat or hang it from a suitable organiser. Keep the slider and pendant separated from other chains where possible.
For travel, place each necklace in its own pouch or compartment with the chain arranged. If a knot forms, lay it flat and loosen it patiently; pulling the slider through a knot can tighten it further.
More storage and travel methods are covered in the guide to stopping necklaces from tangling.
Common slider necklace problems
The slider will not move
Check that the chain is straight and that you are holding the intended part of the mechanism. Look for a twist or knot close to the bead. If the slider still resists, do not force it. The design may require a release action, or the component may need professional attention.
The slider moves but will not stay in place
A slider that slips during wear is not performing as intended. Stop wearing the necklace until the mechanism can be inspected. Repeatedly tightening, squeezing or bending the bead can damage both the housing and the chain.
The loose end keeps tangling
Shortening some designs creates a longer tail. Arrange it before putting the necklace on, and lengthen the piece for storage to reduce loose chain.
The chain looks kinked
Lay it flat and let the chain settle naturally. Do not bend the kink back and forth. If it remains misshapen, ask a jeweller to assess it before moving the slider across that point.
Frequently asked questions
Can every slider necklace be worn as a choker?
No. The minimum and maximum length depend on the design. “Adjustable” means the necklace offers a range, not that every possible length is available. Check the measurements and make sure the shorter setting feels comfortable without pressure.
Can I adjust a slider necklace while wearing it?
Only if the maker’s instructions say that the mechanism is designed for it and you can move it without pulling at an angle. Laying the necklace flat gives better visibility and control, particularly with a fine chain.
Is a slider necklace the same as a bolo necklace?
Not always. A bolo necklace is one type of adjustable design, usually with two ends passing through a central slide. Slider necklaces also include single-chain adjusters, spring mechanisms and sliding-knot cords.
Are slider necklaces easier to layer?
They can make spacing easier because you can change where the necklace sits. They do not prevent tangling on their own, so chain texture, pendant shape, movement and storage still matter.
One necklace, more control over the position
The practical advantage of a slider necklace is not that it replaces every other length, but that it gives you more control within its designed range. Identify the mechanism, adjust it slowly and in a straight line, and stop if it catches or slips. Once the fit is set, use the flexibility to work with different necklines, layers and outfits—without forcing the chain or turning the adjustment into a daily struggle.